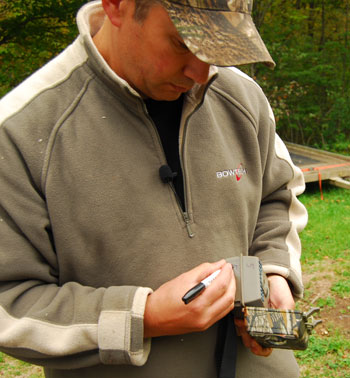
This is an often overlooked step that can save you a lot of frustration. Cameras contain software which run the device. This software is often called FIRMWARE and many times issues are identified after the cameras are sold in stores. Updating that firmware fixes bugs and problems and that update is typically a very easy step. Go to the website for your camera manufacturer and see if your camera has any firmware updates. If they do, download it and apply it to all of your cameras from that model. Caution, follow the instructions to the letter. If your camera batteries go dead during the firmware update, or you stop the update prior to completion you can hose the camera.
2 Number your cameras, chips, and GPS the location
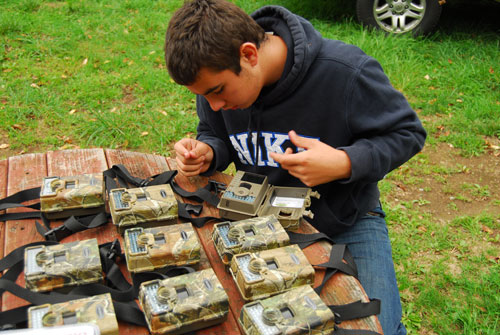
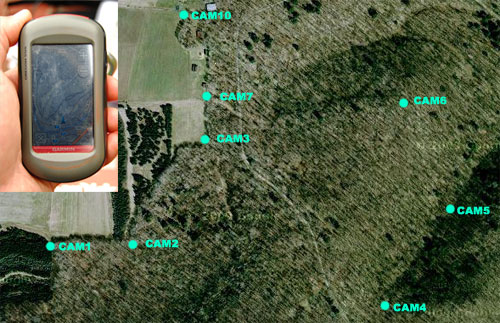
On our properties we deploy a lot of game cameras. We number every camera in 3 spots with a Sharpie marker. We also number the Chip for that camera. We rarely swap chips or take them out of the field but if we do we know exactly what chip we have in our pocket. Many of the new cameras allow you to imprint a name or number on the photo. On our cameras we will have the camera, chip, and software consistently named which organizes your system. Since we put out so many cameras we GPS the location of every camera. It took me a couple of lost cameras to discover this tip. I don't know how many times I put a camera in some thick area only to lose track of it's exact location when I went back to check it. I keep a map of all my game cams updated at all times, even if I only have a couple of cams deployed.
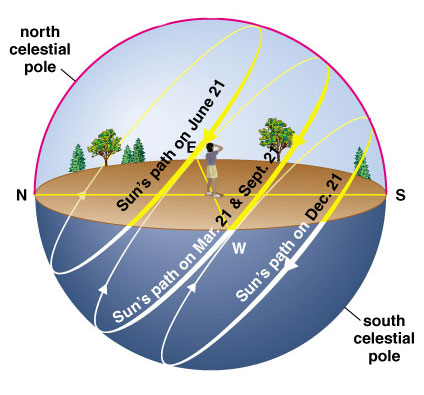
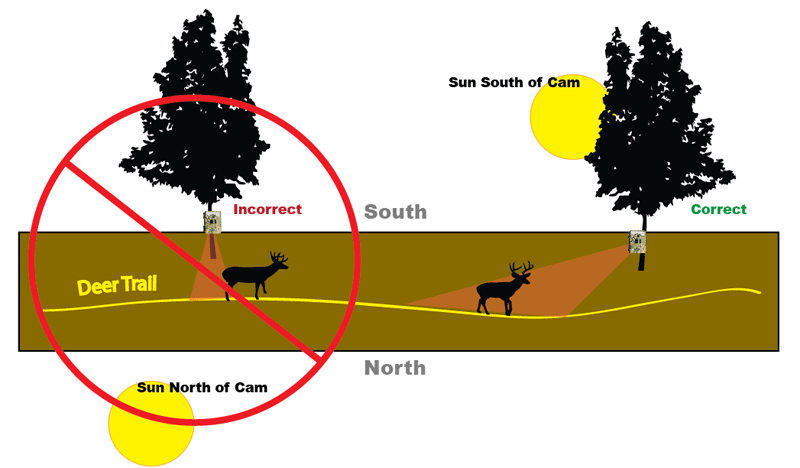
3 Place camera South of your target area
Said another way, point your camera to the North. By pointing your camera north you avoid sun glare that can trigger your camera absent of game. It can also prevent exposure blow-out due to strong backlight. Take a compass out with you when you hang your cams and it will save you a lot of false positives and ruined photos.
4 Angle camera to trail
This is a simple thing to do yet many hunters still miss this. Unless you are hunting bait, a lick, or a scrape you should hang your camera at a 45° angle to the trail. By doing this you increase the trigger time exponentially which should give you a better photo of the entire animal. When you hang the camera perpendicular to the trail, the sensor may take a second or two to wake and trigger the photo resulting in a photo of a deers' butt or worse - no deer at all because it passed through the frame before the camera triggered. By placing the camera at an angle you greatly increase your chances of getting that perfect shot.
5 Deter thieves
There is nothing worse than spending $200 on a new trail camera and having it stolen by thieving bastards in the woods. The first thing you must accept is that any camera is at risk of being stolen. If that will drive you crazy don't invest in trail cameras. Period. All you can do is minimize the opportunity for them to be stolen but nothing will stop a determined thief. We have heard stories of guys cutting down trees in order to slip an anti-theft cable off the trunk. The 80-20 rule applies here. You can deter thefts by trying some or all of these theft prevention measures. First, don't hang your camera in an obvious location. A trail camera hanging on a logging road or next to a feeder is inviting trouble. When we hang our cameras we try to find a less obvious location that does not pop out visually. Consider hanging your cameras higher in trees. It may mean carrying around a little stool or short ladder but thieves rarely look for cams in trees and if they see them they would need a way to reach them. Other theft deterrents techniques are obvious. Security cables work well for casual deterrents but if a thief can't steal the camera they may destroy it. The cables add more cost to the cam so I rarely use them. Finally, some new cameras include security codes which render the camera useless. It won't deter the theft, but at least I have the satisfaction of knowing the scumbag won't be enjoying my hard-earned cam either.
6 Use combination of time lapse and trail modes
Last year I learned about the new Time Lapse feature found on many trail cams. My first thought was "Brilliant!" I couldn't wait to use them this year and my anticipation and excitement was well-founded. This has opened up some incredible opportunities for scouting. But they are not perfect. After running several cams in plot mode I find them incredibly useful for identifying deer movements over a wide area. What they are not good at is identifying any details about particular animals. This is due to the fact that they are designed to cover a wide area. The right approach is to use a combination of time lapse and trail cameras. I first identify the main routes by using the time lapse mode, then I placed trail cams on those routes which gave me a better view of individual animals. A lot of guys are using time lapse on fields and plots. This is a perfect application of time lapse cameras. However, I just hung a time lapse cam into a wooded area with multiple trails and that should give me a perspective on forest movement as well. One word of caution about Time Lapse - expect rapid battery drain for complete coverage. There is no perfect solution for these cams. My first attempt I set my time lapse at a 15sec interval and full day coverage. I got 4 days of battery life. I now set my cams for the first and last 2 hours of the day - and a 30sec interval. This gives me a couple of weeks of battery life - at the expense of a few missed events.
7 Remove obstructions and confirm position of camera
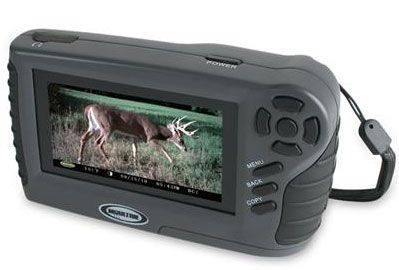
I like brush around my trail cams. It helps to hide the camera from thieves. But just be sure you have a clear view to your trail. Otherwise the LED illumination will light up the brush in front of the camera. This renders the target underexposed or not exposed at all. I take a pair of clippers with me and make sure I check the frame using my Moultrie M100 camera's Live View. If your cam does not have Live View, consider carrying a device which can view the photos in the field. Small digital cameras work. If you really want to get fancy I like the portable trail camera viewers that allow me to transfer the data to a second larger collection card. Setting cameras up 'blind' is not efficient.
Bad Positioning
Good Positioning
8 Target a specific buck
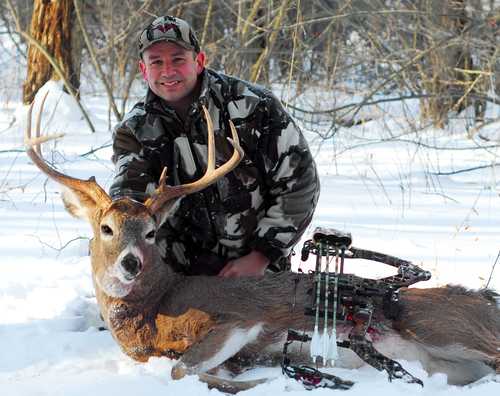
I set up trail cams with three objectives in mind. My first objective is to identify how much activity a given area is getting. Time lapse is perfect for this objective. My second objective is to identify travel routes and times. I will use both time lapse and trail cam modes for this objective. During these two objectives I am looking for a target buck. I need to see him twice in the same area before I bring in more cameras for better coverage. Last year I spotted a giant old buck that I knew well on one of my properties. I had seen him over several years but when I hadn't seen him in over a year I thought he had died. When he showed up I put out three cameras in that area to pinpoint his movements. With that knowledge I knew he showed up inconsistently during the day and consistently in the evening. My only opportunity to kill this buck was to put as much time in the seat as I could tolerate. It took me a month but he eventually made a mistake on a secondary trail and I killed my oldest buck three days after Christmas. Without targeting this buck with trail cams I would have never patterned him and would likely have chosen a different stand.
9 Develop a collection and archival system
You have your trail cams in the woods and they are busily snapping photos. That is half the battle. Collecting that data and analyzing what it's telling you is almost as important as the photo. Collecting the photos is the first step. I do one of two things. I bought a cheap Netbook laptop and I carry around on my quad or backpack. I copy the chips right to my laptop, format the chip, and place it back into the camera. I can then review the photos or watch my time lapse clips right then and there. Best part is that I do not need to swap chips so I never forget, or lose them. I have recently been using a collection device made by Moultrie which works great for photos but not Time Lapse. Once the photos are collected they need to be archived. This is nothing more than a directory structure on my PC's desktop. I have a Directory called Game Cams with a directory structure set up like this: Game Cams / State / Property / Stand Name or Number / Date1, Date2, Date3, etc. I purge them of all photos other than rack bucks. Those I keep forever so I can reference individual bucks over time. I do not archive Time Lapse unless I can pull out a single photo of a defined buck. I typically watch the clips start to finish and make a note about what I am seeing in a particular location.
10 Don't forget the post season
One of the most interesting things you can do is to collect post-season photos using trail cams. This is a great way to find out if that big buck made it through the season and will be even bigger next year! Where legal, I use bait for post-season photo collecting. I place a big corn pile in the woods with a cam in front of it. Two considerations; if your season runs until Jan 31st antlers may have already shed so usefulness may be reduced. You should still be able to see pedicles and other characteristics. Battery life will be greatly reduced in the cold. And if you have snow and are hunting state land, thieves can follow your tracks to your trail cams. Still, I started doing this a few years ago and it's been very helpful. In fact, that old 7.5 year old buck I killed in 2010 was shot in the shoulder in 2007. We were not sure he survived until he showed up on a post season photo over bait on the same property. We knew he survived the shot and as of this writing he is at the taxidermist.
Video showing our set up process using an M100 Mini Cam
Check out the new Moultie M100 Game cam. A small package with Big features! Includes a Live View screen, a time lapse plot mode, and up to 1-Year battery life!