In a perfect world, the scenario goes like this: With a cameraman posed slightly above and over the shoulder of the shooter. The shooter is out of focus and the deer (or target animal) is in sharp focus. Just before the shot, the cameraman zooms in to a 50% frame size deer and the impact is clearly seen. The deer runs off and then the cameraman zooms out and films the reaction of the shooter.
But for most of us, this is not practical. I very rarely hunt with a cameraman so the shot I get on tape are all self-filmed. If you’ve ever seen a homemade video of a deer being shot, chances are you saw the deer approaching – sometimes for a painfully long time and then you see an arrow goring through it. If you are lucky, there’s a hero shot at the end with the shooter holding the deer up and saying a few words about his trophy. But on a well-done video, you see the hunter spot the deer, then you see the deer approach, the hunter draws, the video cuts back to the deer and the arrow impact is filmed. The last frame is of the hunter before he climbs down and collects his trophy.
This is the money shot, but by itself it’s not enough
Breaking up the deer approach and shot with human interaction makes the video more compelling. It also gets the viewer ready for the impending shot. If you’ve ever seen a video of a deer moving closer and then you see the hunter draw, you simply can’t turn away. You are captured and will remain glued to the set until the animal busts out. Getting that shot is very simple but you need to do a bit of re-enactment in order for it to work. Another method I have used is a 2-camera setup. I have a camera on the shooter and a camera on the animal. While I’ve not tried that from a stand, I have done it several times from a blind.
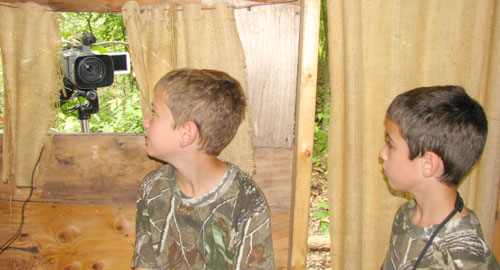
On shoots including blinds, I will often use a 2 nd camera to capture the shooter too!
Here’s how to do a basic pre-shot, drawing, and post shot sequence: Immediately after the actual kill shot. Swing your video arm as far away from you as you can get it. On most video cameras you can flip the viewfinder 180 degrees so it is facing the same way as the lens. This allows you to see, and frame yourself correctly. Now, recreate the exact sequence that you just performed right up to you releasing an arrow. If the deer approached from the east, look to the east, then reach for your bow, follow the (memory of the deer) with your eyes, and then draw back and hold it there. This entire sequence should take about 1-2 minutes. It will then be cut into the deer footage during editing. The resulting footage looks like this:
- (Hunter) sees something approaching
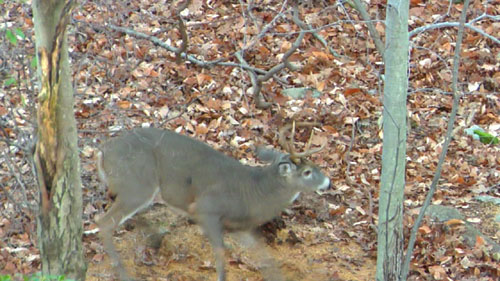
- (Deer) moving in toward the stand
- (Hunter) watches intently
- (Deer) getting closer
- (Hunter) reaches for bow
- (Deer) getting closer
- (Hunter) tracking deer with bow (moving bow with deer
- (Deer) in range
- (Hunter) draws his bow
- (Deer) in range
- (Hunter) at full draw
- (Deer) arrow is shot, passes through deer, deer runs away
- (Hunter) watches deer in the direction it ran (smile, wink, happy dance optional)
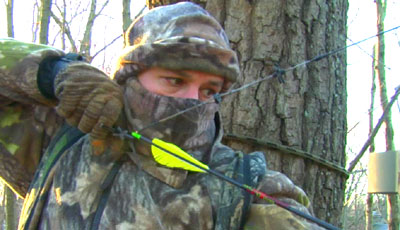
This draw was recreated 5 minutes after the deer was shot.
I can’t stress enough how important it is to capture this footage immediately after the kill. Besides, you probably have 15-60 minute wait on your hands anyway so what better way to kill it then filming edits. By doing it immediately after the kill, everything is accurate like lighting, weather conditions, setting, equipment, etc. Trying to recreate this sequence later is difficult and almost always perceptible.
A word about re-enactment: Some people find this tacky. I don’t. I feel as long as it was done relatively quick after the shot it’s perfectly acceptable. Again, without a cameraman, or a difficult two-camera setup, you really have no choice other than to omit it altogether – which I do not recommend.
Take a look at both of these clips that illustrate the difference between interesting footage and boring footage. We had a blooper on the draw but left it in for its comic value…
Raw Deer Clip
Edited Hunt Sequence
The above section discusses shooting edits that complete the kill shot. But edits go much further than just that sequence. If you want to produce a DVD that shows just one kill after another, then you are complete after following the above steps. But most people want to see more of the hunt. That includes the scenery, the treestand setup, getting to and from the stand, scouting, etc. These can be re-enactments or the real thing. If they are the real thing, then you will be impacting your hunt by carrying around gear while you still have a tag in your pocket. What I recommend is to film some of these edits before, during, and after the hunt. Here’s my recommendation for edits:
- Sunrise and Sunsets (at least 6)
- Scenery shots on tripod (count 15 seconds for each) shoot a minimum of 10 scenery shots
- Deer Scenes – Wide Angle (as many as you can get)
- Deer Scenes – Zoomed close (as many as you can get)
- Walking to and from the stand
- Climbing the treestand (downward angle, upward angle, from some distance – I like 50 yard shot with a 25% frame)
- Putting on safety harness
- Checking the wind (close up on feather, powder bottle, dust, etc)
- Pulling up bow (downward angle)
- Sitting down and settling in
- Shot Sequence Above
- Climbing down from stand
- Finding arrow (you in frame)
- Finding blood (you in frame)
- Close-up of blood
- Close-up of blood with your fingers picking up leave, etc.
- You Looking on ground for blood
- Another Close-up of blood
- Seeing the deer
- Pointing at the deer
- Putting your hands on the deer for the first time
- Looking proud
All of these edits help to portray the story around your kill. It will create a lasting memory of your hunt and a watchable video. If you watched our DVD, Beyond Adrenaline and click on our Kansas Whitetail Hunt, you will see examples of everything above. The result is a fast-moving synopsis of our entire hunt in 15 minutes.
Reverse-Angle Recovery - In the ‘80’s and early 90’s the rage with hunting video producers was to put the video camera on a tripod in front of the deer with the hunter approaching behind and acting like he just found it for the first time. Now, I am not opposed to re-enactments whatsoever, but this shot is too transparent for it to be considered for your video. The public has pretty much soured on this shot and so have most respectable videographers. Avoid the temptation and either hand your buddy the video camera or put the camera on a tripod and film yourself walking up to the deer from behind you, not the deer.
Spine Shots – Spine shots happen. And you can continue filming them. But don’t use the animal writhing on the ground for your edited video. Cut away to a clip of the shooter or a fade to the shooter climbing down the stand and recovering the now dead deer. If you must record the coup-de’-grace shot for your own memories that’s fine, but leave it out of the edited version.
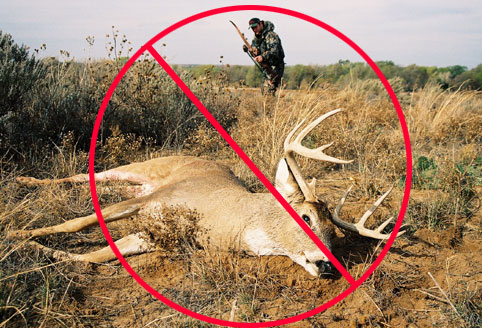
Poor Shots – Unless there is a compelling reason to display a poor shot, I would recommend omitting them completely from your final video. They happen to all of us on occasion but there’s nothing worse than seeing a poor shot on video and no hero footage. You can only assume the worst and most of the time your assumption is correct – the animal was not recovered. In addition, do not film a poor shot and then try to pawn it off as a good shot. People aren’t stupid, a hunter can immediately tell a good shot from bad. Be honest about it.
Excessive Acting – on re-enactments, my motto is simple: less is more. Some guys go over the top when they film their re-enactments. I don’t care for this much. Now, if you have a cameraman and he films an honest moment that includes pure elation, I think that’s great and completely acceptable. But on edits, it appears contrived. Keep the reaction to a minimum. A quick fist pump or a thumbs’ up is about all I’d recommend even if you did cartwheels in real-life.